Wednesday, September 19, 2018

Road Trip to Bike the Route of the Hiawatha in Northern Idaho

Not exactly the "Canadian Rockies," but we are a family who LOVES biking, so we travelled to Northern Idaho this past summer to ride one of the best family trails in North America. The Route of the Hiawatha is also one of the most popular rail trails in the United States which further intrigued us.

Biking on the Route of the Hiawatha, Idaho


The Nuts and Bolts for the Route of the Hiawatha Trail 


Distance to the trailhead from Calgary, Alberta 


Roughly 7.5 hours (~ 700 km)


Nearest City to the trailhead 


Coeur D'Alene, Idaho

Riding out of a tunnel that was almost 3 kilometres long!


Why you want to bike this trail 


The Route of the Hiawatha Trail is a 14 mile long rail trail (22.5 km) that you ride one-way with a shuttle back to your vehicle at the end. The trail is relatively flat or downhill the entire time and you get to bike through 9 tunnels! There are also 7 trestle bridges that you'll ride over.

Also, the longest tunnel is 1.7 miles long (2.7 km!) And you get to ride it both ways on the way out, and back.

And cool fact: The trail actually starts in Montana, crossing into Idaho as you ride through the first tunnel.

It should be noted too that you don't have to set up your own return shuttle! (Always a struggle when on vacation with just one vehicle.) Most people pay to ride one of the shuttle busses that leaves every 15 minutes or so from the final parking lot.


Recommended Camping near the trail 


We camped at Farragut State Park (just over an hour and a half away and conveniently located near Silverwood Amusement Park.

- and a tip for those planning to visit Silverwood, buy tickets in advance. I bought tickets months early at early bird pricing.

West Portal Trailhead of the Hiawatha Trail

Cost to ride the trail 


The trail is operated by the Lookout Pass Ski Area

One of the many tunnels on the Hiawatha Trail
There is a trail fee required to ride this trail. This does not include the shuttle fee, and you must pay it even if you have your own bike. 

Adult Trail Passes - $11

Children's Trail Passes - $7 (ages 6-13)

Adult Shuttle Tickets - $9

Children's Shuttle Tickets - $6 (ages 6-13)

You can also rent bikes and lights for the tunnels if you need. 

All information on fees and rentals can be found here. 

We stopped in at the ski area first to purchase our trail fees and return shuttle tickets. Then we drove to the nearby trailhead, 7 miles away (11 km.) 


One of the many steel trestle bridges on the Hiawatha Trail


Our Experience on the Route of the Hiawatha 


After purchasing our tickets at the Lookout Pass Ski Area, we drove the 7 miles to the trailhead which was already packed! We discovered quickly that you want to arrive early for this one if you want to find parking. 

Fortunately, once we started, the other bikers all spread out and the trail never felt crowded. It was very hot though (30+ degrees) so an early start is good for that reason alone. (though the tunnels do cool you off quite quickly.)

The trail never felt busy as the crowds spread out along the route

Riding from the East Portal to the West Portal through the Taft Tunnel 


You immediately start your journey by biking through the 1.7 mile long St. Paul Pass (Taft) Tunnel which was the highlight of the trip for us. It never felt crowded in the tunnel and once inside, our world turned pitch black! There are no lights in the tunnels and the only thing keeping you on the path through the middle is whatever light shines down from your headlamp or bike light.

We only had headlamps and they felt a bit dim at times. I'd recommend going with the strongest/brightest headlamps you have (or renting lights from the ski area.) It was a tad scary riding through the tunnel without good visibility, but it was also a LOT of fun! My husband and son had a blast making zombie sounds the entire time (yes, for over 2 straight kilometres!!)

Starting off through the Taft Tunnel 

West Portal to the official Route of the Hiawatha 


When you get out of the tunnel, you'll be on a shared road with shuttle bus traffic for the next 2.3 miles (3.7 km.)

Fortunately the road is wide and the busses drive very slowly. You're also riding downhill. 

On the way back, the bus will drop you off at the end of this road, right at the entrance to the Taft Tunnel for one final ride through and back to the parking lot. (adding an extra 2 miles to your total bike distance.)

There is also one tunnel on this stretch of road (that again is shared with bus traffic) but the busses will honk their horns before driving through the tunnel so you have time to get over to the side, or to get out quickly.

The tunnels were a big highlight of this bike ride!


Riding the Route of the Hiawatha


Now that we were on the actual trail, we got to enjoy wide easy riding, mostly downhill or flat at a nice gentle rail grade, as we passed through numerous tunnels and rode over beautiful steel trestle bridges.

The longest tunnel on this stretch was 1516 feet long (0.4 km) and it was the first one (so keep your headlamps handy.) Most of the others were short enough that we didn't really need our lights.

From the first tunnel to tunnel #28 we rode 5.8 miles (9.3 km.) And this was definitely the "fun" part. In this stretch, we rode through 6 tunnels and across 7 bridges.

Endless tunnels on the Hiawatha Trail

The Final Part of the Hiawatha Trail to the Parking Lot 


After tunnel #28 we still had 4.5 miles (7 km) to ride before we reached the final parking lot (and there was only one tunnel on this stretch, right at the very end.) 

This section was quite boring to be honest and my son was far from a happy camper here. The trail was very bumpy with a washboard surface and lacked views or anything of real interest.

Bring candy and snacks for this part and try to think of fun ways to help the kilometres go by quickly.

We would have turned around at tunnel 28, but then we would have been riding back uphill to the West Portal and that didn't seem terribly appealing at the time.

We really enjoyed all of the tunnels and bridges on the Route of the Hiawatha


The Shuttle Ride Back


Make sure you get your bikes in the lineup as soon as you arrive in the parking lot as you may have to wait for a few busses before you can get on one. 

When you do get on a bus, they will load all of the bikes in the back, and then the passengers up front for the ride back to the West Portal (And Taft Tunnel entrance.) 

And yes, they will take Chariots or bike trailers on the bus.

The shuttle ride back to the start of the Hiawatha

Additional Tips for Riding the Route of the Hiawatha


I've included suggestions throughout this guide, but here are a few extra that come to mind.

  • A light pair of mittens or gloves would be beneficial for the Taft Tunnel. My hands were frozen by the time we got out.

  • Bring a light sweater or long sleeve shirt for the Taft Tunnel. It's very chilly inside.

  • As already mentioned, you want bright lights for the Taft Tunnel! Rent lights from the ski hill if your headlamps aren't very powerful (or if you don't have good headlamps.)

  • Keep your lights handy throughout the ride. We needed them several times for the various tunnels

  • As already mentioned, you'll want motivation of some sort for the final push back to the parking lot.

  • Start early in the day to get parking, to have a more peaceful experience on the trail, and to reduce wait times for the shuttle bus at the end.

  • Dogs are NOT allowed on the trail (even in a Chariot or bike trailer.) Sorry, not my rule.

  • Bicycle helmets must be worn at all times on the trail.

  • Adult supervision is required for all children under the age of 14.

  • You can buy trail passes at the trailhead if you don't want to stop in at the ski area. You must have cash though if buying trail passes on the trail. Credit cards are only accepted for payment at the ski area.

  • Do not stop in the middle of the tunnels (common sense, right?)

  • Use restrooms at the trailheads! (They are fairly strict about not turning the trail into a giant toilet.) - and there are a few trailheads along the way.

  • Pack out your garbage! There are no garbage cans on the trail.

  • Bring cash to buy cold beverages at the end if you want something while waiting for the next bus.
And another tunnel on the Route of the Hiawatha

Season for the Route of the Hiawatha 


The trail opens late May (May 25th for 2019) for weekend use with shuttles.

Shuttles start to run weekdays starting the second weekend in June (June 8th for 2019.)

Hours are reduced in September with the trail closing after the third weekend of September (the 22nd would be the last day for 2019.)

For full information on schedules, visit the Route of the Hiawatha website. 

Classic Rail Trail through Northern Idaho and Montana


Disclaimer: This story was not sponsored and we did not partner with the Lookout Ski Area. We visited Idaho like normal tourists and I am simply writing about our adventures to inspire other families to enjoy this trail.

Thursday, September 13, 2018

The BEST of Autumn in the Canadian Rockies - updated 2024

Continuing with my "Gotta do THIS" seasonal series, here is my "BEST of Autumn Guide" for the Canadian Rockies (and beyond.) I encourage you to save this post because I will be updating it annually.

Hiking through a golden larch forest in the Canadian Rockies

Autumn is an exciting time for us because it means we get to enjoy all of our favourite sports and outdoor activities in the same season! We'll seize the warm fall days to get out for some final biking, hiking, or climbing days, we'll wrap up the season with one or two final camping trips, and we'll get the skis and skates out for our first cold weather adventures! And maybe we'll even squeeze in one more backcountry trip or river paddling day.

As with my other guides, this list is in no particular order (though I did try to go from warm to cold.) Follow the links to read stories I've already written on each topic.

Autumn colors at Sunshine Village, Banff 


The BEST of Autumn in the Canadian Rockies 


1. Enjoy one last picnic, day trip, or hike in the mountains


Thursday, September 06, 2018

Our Favourite Autumn Larch Hikes in the Canadian Rockies

A larch tree looks like a normal evergreen tree until mid September when the needles turn bright golden yellow and begin to slowly fall off for the winter. New needles come back the following spring, making this a very unusual "evergreen tree" since it's definitely not green year round. In winter, you'd just see a bare trunk and branches (like any deciduous tree.)

Hiking through golden larch trees, Kananaskis

Golden fall hiking at Highwood Pass, Kananaskis

When and Where to See Golden Larch Trees in the Canadian Rockies 


The peak time to see larch trees in all their autumn splendor is from mid to late September here in the Canadian Rockies. (And in my experience, they're absolutely magical around the third weekend of the month. Aim for the 22nd - 27th.


Golden larch trees in Banff National Park 

Want to do a fall hike and see golden larch trees? The trails I've featured below are the most popular trails (for very good reason.) They are also the busiest so if you can go mid-week, do it!! If you have to go on Saturday or Sunday, start crazy early!!


Larch Valley, Moraine Lake, Banff National Park 

Access for Moraine Lake and Lake Louise

If you want to hike in the Moraine Lake area of Banff, you will have to take a shuttle bus to Moraine Lake from the Lake Louise Ski Resort. The road has been closed to public vehicles.

You can also take a bus to Lake Louise from the ski hill to save the hassle of trying to find parking (and avoid having to pay for parking at the lake.)

Shuttles must be booked ahead of time at the link above. 


Larch Hikes around Lake Louise and Moraine Lake


Larch Valley, Moraine Lake (Lake Louise area of Banff National Park)


It's a 7 km return hike to reach the most magical valley at Lake Louise. Larch Valley is also referred to as "Valley of the Ten Peaks," and you'll quickly see why when you reach the first meadow. It is 11.6 km return if you go all the way to Sentinel Pass (which you should if you have the stamina for the 700 metres of height gain.) From the top of the pass, it's larch trees as far as the eyes can see in every direction.


You'll also see good routes on the popular All Trails app.

And to escape the crowds, consider hiking up the Eiffel Lakes valley from the same trailhead. (5.6 km one way with 370 metres of climbing.)

For a beautiful one-way traverse, check out this hike below:

Read: Hike Moraine Lake to Lake Louise (via Sentinel and Saddleback Pass)

Glorious golden colors in Larch Valley at Lake Louise


Saddleback Pass and Mount Fairview, Lake Louise (Banff National Park)


Not as popular as Larch Valley, this can be a great option on a busy weekend. It is 3.7 km to the pass from where you have two options. 

Option one: scramble an extra 100 metres up to the summit of Saddle Mountain (to your left) for a total of roughly 700 metres of height gain. 


Saddle Mountain Summit looking down on Saddleback Pass

Option two: hike to the summit of Fairview Mountain in a total height gain of 1000 metres. It takes a big push at the end but the views are worth it!! And don't worry about not seeing enough larch trees because that's all you'll see in every direction from either summit.

Recommended Reading: 


Read: Hike Moraine Lake to Lake Louise (via Sentinel and Saddleback Pass)

Mount Fairview Summit, Lake Louise

Lake Agnes Tea House, Lake Louise (Banff National Park)


While maybe not "as incredible" as Larch Valley or Saddleback Pass, this hike is much easier and better with young children. The hike is 6.8 km round trip to a beautiful tea house, small lake, and gorgeous little larch forest en route to the Big Beehive viewpoint above the lake. 

It is an extra 3.2 km round trip to reach the Big Beehive viewpoint above Lake Agnes with an extra 100 metres of height gain. (520 metres total)


Lake Agnes in late September


Follow this link for information on all hiking trails at Moraine Lake and Lake Louise on the Banff Lake Louise Tourism website.

- and note that there is sometimes a restriction for trails at Moraine Lake requiring you to hike in a tight group of 4 people. See trail reports here.

No filter, no editing required. This is why people hike at Lake Louise in September

Mount St. Piran, Lake Louise (Banff National Park)


This summit is reached via the trail to the Lake Agnes Tea House. The hike requires gaining 900 metres of elevation spread out over 12+km round trip (if you do the full loop off the back side as we did.)


Hiking up the slopes of Mount St. Piran with larch trees around us

The hike can be dangerous if there is too much snow on the slopes, but the larch trees along the way are magical. (Check in at the Visitor Centre for conditions before starting this hike.)

Read about our adventures on this hike here:  First Summits - Mount St. Piran, Lake Louise

And see the route on All Trails here


Mount St. Piran Summit in Late September


The Big Beehive and the Devil's Thumb, Lake Louise (Banff National Park)


We haven't done this hike in the fall yet, but we recently did it in the summer. The views are incredible as you look down on both Lake Agnes (above) and Lake Louise. 

First hike to Lake Agnes and then continue around the lake where you'll start to see larch trees. Climb up switchbacks to the Big Beehive lookout over Lake Louise. 

If you still have energy continue up another viewpoint, the Devil's Thumb where you'll be looking down on larch trees as far as you can see.

Devil's Thumb, Lake Louise (and most of those trees below are larch trees)


The entire hike is 12 km round trip with over 1000 metres of height gain.

For more information please read my previous story below.


Mirror Lake below the Big Beehive (you can hike to the very top!)


Larch Hiking in the Skoki Valley, Lake Louise


Another popular area to hike at Lake Louise is found across the highway from the Village near the Lake Louise Ski Resort.

For all Skoki Valley hikes, you'll park at the Fish Creek Parking Lot just east of the Village and on the same road you'd drive to reach the ski hill. See a map on the All Trails website here

Boulder Pass, Skoki Valley


And here begins the crux / challenge for all Skoki hikes: the trail that takes you into the Skoki Valley doesn't start at the parking lot. It starts just below Temple Lodge on the back side of the ski resort. And there's only one way to reach this trailhead - by walking the ski out road.

You'll begin your hike with a 3.5 km road walk before you reach the true trailhead. And there is no shuttle bus service provided to get here unless you're staying at the decadent Skoki Lodge

Most people either backpack the Skoki Loop, or hike around the area from one of the backcountry campgrounds located in the valley. Only strong day hikers will want to even consider hiking here as a day trip - and likely not with children unfortunately.

The Skoki Valley is larch heaven with thousands upon thousands of larch trees as far as the eye can see, but the price is 7 km of road walking to and from the trailhead.

Perched above the Skoki Lakes from Packers Pass

Once you reach the trailhead, the nearest objective is Boulder Pass and Ptarmigan Lake, a gorgeous location in larch season, reached in 10 km of hiking, round trip, from the end of the road. - For a total distance of 17 km.

Beyond Ptarmigan Lake, many people set their sites on Packers Pass and the Skoki Lakes which brings your day's distance up to 24 km with the road walk.

Ptarmigan Lake, Skoki

Boulder Pass, Skoki

On my recent hike into Skoki for larch season we visited Packers Pass to look down on the Skoki Lakes and our total distance was 24 km with 1000 metres of height gain. It was a beautiful day, but a long one, and not something I'd do with most children. 

My son joined us on our recent trip, but only because we biked the road - which is allowed, but it's one heck of a climb!! You'll save 7 km off your feet by biking the gravel road, but your lungs will pay for it on the way up. coming out of course is fast and fun. 

The Skoki Valley is filled with thousands of larch trees

Looking down on the Skoki Lakes from Packers  Pass

Other Larch Hikes in Banff National Park 


Arnica Lake, Banff 


You'll start from the Vista Lake trailhead off Highway 93 on the boundary of Banff and Kootenay National Parks. I like to call this the "Grand Lake Traverse" because you'll have the opportunity to visit Vista Lake, Arnica Lake, and then the Twin Lakes in a 17 km return hike.

Note this hike has a LOT of height gain in both directions. Fortunately you have several options for turnout points. The highest concentration of larch trees can be seen at Arnica Lake (and just above at the lookout) so make sure you get that far at least.

Arnica Lake late September

Also, this trail is VERY popular so arrive early to get parking in the small lot. And, honestly if you have to park on the highway it's kind of a sign that you were too late and you should have a backup plan. 

Rockbound Lake and Taylor Lake are both nearby in Banff and make for beautiful larch hikes if you need a plan B.

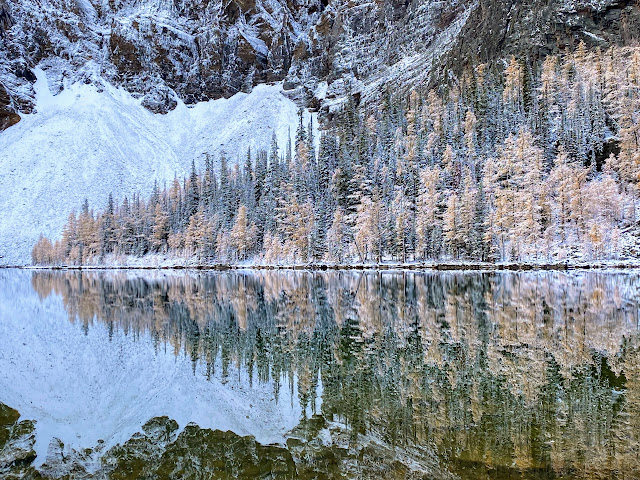
Frosted larch trees at Arnica Lake.

Trail information:

The trail to Arnica Lake begins by losing 137 metres of height as you descend to Vista Lake in 1.4 kilometres. You then climb 579 metres to reach Arnica Lake over 3.6 km.

Upon reaching Arnica Lake, you have another 138 metres to gain in less than a kilometre before you reach the high point above the Twin Lakes. Upon reaching the high point, I recommend following a faint trail to your right which will take you to a viewpoint over Arnica Lake. It's the only place where you can look down on the lake. It's a popular viewpoint in fall when you can see many golden larch trees above the lake.

Most day hikers turn around here. If you want to continue to the Twin Lakes, you'll descend 229 metres over 2.4 km to reach the first Twin Lake and a small backcountry campground. It's a short walk to the second lake.


Golden larch trees as far as you can see at the viewpoint above Arnica Lake

Gibbon Pass, Banff


Continue past the Twin Lakes above via the Arnica Lake trail to reach Gibbon Pass. Here you'll find hundreds of golden larch trees and the opportunity to climb to the summit of Little Copper if you still have energy.

Follow the directions to the Twin Lakes above. After reaching the two Twin Lakes, you begin to climb again to reach the top of Gibbon Pass. Fortunately, this is a very gradual section of trail and it's a breeze compared to the climb to Arnica Lake. And it's only 224 metres of very gradual climbing here spread out over 2.7 km.

Gibbon Pass, Banff National Park

Looking up at the snowy summit of Little Copper above Gibbon Pass

You'll know you're getting close to the pass when larch trees begin to surround you on all sides and the trail becomes simply golden late September.

If you still have energy, you can climb to the top of Little Copper which is another 300 - 400 metres above you.

Remember, what goes down on the way in, has to go UP on the way back out. So you'll still have two climbs ahead of you to reach the parking lot.

Look out over the Bow Valley from the summit of Little Copper

Look down over Gibbon Pass and Shadow Lake from Little Copper


Extend your Hike to Gibbon Pass with a stay at Shadow Lake Backcountry Lodge


From Gibbon Pass you can drop down the other side of the pass to reach another lake in only 3 additional kilometres (one way.)

Shadow Lake is my favourite backcountry lake in Banff and it's an easy extension from the pass if you don't have to climb back up! You'll lose 450 metres of height dropping down to the lake where you'll find a beautiful backcountry lodge waiting for you!

Gorgeous Shadow Lake in Backcountry Banff

Enjoy the luxury of going backpacking in the Canadian Rockies without a tent or sleeping bag, carrying nothing other than your regular day hiking gear, lunch for the first day, and basic overnight items.

Waiting for you at Shadow Lake is your own private cabin at the lodge, gourmet meals prepared by a culinary team on site, hot water + showers, and comfortable beds to sleep in!

Enjoy two nights at the lodge, explore around the area on your free day, and then head out for the return hike back over Gibbon Pass (with fresh energy and full bellies.)


And read about the Little Copper summit extension here (which makes a great day trip from the lodge.)

And read about staying at Shadow Lake Lodge here:


Private cabins at Shadow Lake Lodge in Banff


Larch Hikes in Kananaskis 


Ptarmigan Cirque, Kananaskis 


Located at Highwood Pass in Kananaskis, this is a 4.5 km loop hike with a gorgeous alpine basin and a small larch forest. It sees less traffic than the Banff/Lake Louise hikes, but is still exceptionally busy. Try to hike mid-week.


Larch trees on the Ptarmigan Cirque Trail

Read more about the hike on the Alberta Parks website. And I highly recommend checking the trail report because the trail is often closed for bears. 


Autumn at Highwood Pass: Ptarmigan Cirque

Pocaterra Cirque, Kananaskis


A lesser known alternative to Ptarmigan Cirque, this hike starts from the same parking lot. It is a favourite for us with more larch trees than Ptarmigan Cirque, a gorgeous pond, and fewer crowds.

Trail directions for this unofficial trail: Start from the same parking lot as for Ptarmigan Cirque at Highwood Pass on Highway 40. Head down the trail towards the Highwood Meadows interpretive trail (and don't cross the highway as you would for Ptarmigan Cirque.) 

Pocaterra Cirque in late September with Pocaterra Ridge in the background

Follow the interpretive trail until you reach a sign that mentions staying on the official trail and respecting the environment. There is a smaller dirt trail heading left here off of the interpretive trail. That is your trail. (And yes, you are allowed to hike it.)

Follow the unofficial trail into the cirque, heading for the pond shown in the photo above. The trail is relatively easy to follow for those who have good route finding skills. If you are inexperienced with hiking, please choose the well marked Ptarmigan Cirque trail instead.

The trail is roughly 7 km return to the pond and the cirque.


Larch trees in the upper Pocaterra Cirque 


Pocaterra Ridge, Kananaskis


This is an extension from the Pocaterra Cirque hike above. Total hiking distance from Highwood Pass to Little Highwood Pass along the ridge is approximately 11 km long. You'll also be gaining roughly 900 metres of height (and losing 600 metres.)


Glorious ridge walking on Pocaterra Ridge 


You can read about our adventure hiking this trail here: Pocaterra Ridge, Family Hiking in Kananaskis 

There are many larch trees along the Pocaterra Ridge hike

Arethusa Cirque, Kananaskis 


This is a quieter trail option than the Ptarmigan and Pocaterra Cirque trails. You'll still encounter a large number of hikers on a weekend though so get an early start.

The hike is 4.5 km in length (as a loop) with 378 metres of height gain. 


September snowball fight in Arethusa Cirque (it was an early winter!)


To add to your outing, consider hiking up to the summit of Little Arethusa.


Arethusa Cirque with Little Arethusa in the background

And read about our adventures here:


Little Arethusa Summit above Arethusa Cirque, Kananaskis

Chester Lake, Kananaskis


Chester Lake is a popular family day hike from Calgary and there is a beautiful larch forest if you hike above the lake to the Elephant Rocks. There are also larch trees beside the lake if that's as far as you get.

Chester Lake late fall 

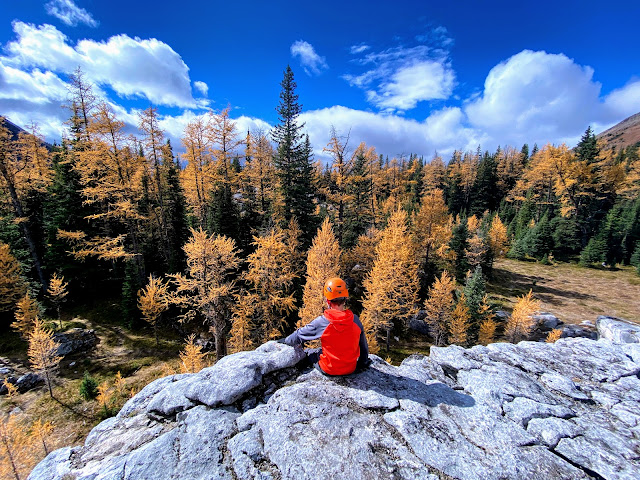
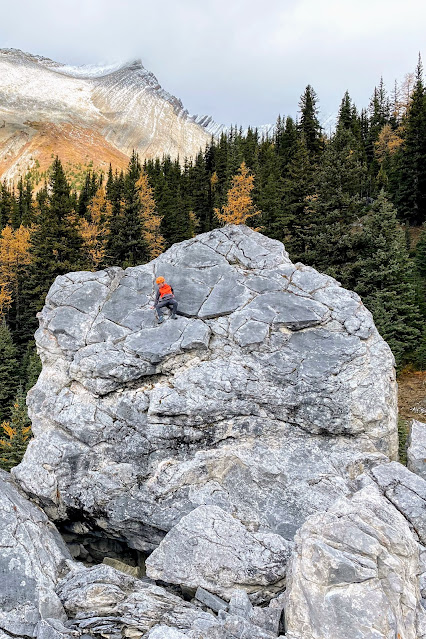
We always hike above the lake to visit the Elephant rocks because they are super fun to scramble on. (why my son is wearing a helmet in the photos below!)


The hike is 9 km return with 400 metres of climbing. 

Views from the Elephant Rocks above Chester Lake

Bring helmets if you have crazy kids like mine!

Rummel Lake, Kananaskis


This is an easy hike in Kananaskis to a pretty lake. Late September you will also find larch trees in the forest around the lake.


The hike is 11km round trip with 400 metres of climbing.

Early season snow and larch trees at Rummel Lake

Rummel Lake with early season snow

Tent Ridge, Kananaskis


This is one of my favourite hikes in Kananaskis and you'll be treated to views of larch trees from the ridge. I like to do the full horseshoe loop (clockwise.) 

Note there is scrambling on this hike so read reviews carefully to determine if it's the right hike for your group. I also wouldn't recommend this hike if there's been fresh snow as it would be slippery on the steep trail.


And read about our family experience here: First Summits - Tent Ridge Horseshoe, Kananaskis

The distance is 10km as a loop with 800 metres of climbing.

Larch trees looking over the Spray Lakes Reservoir from Tent Ridge


Larch Hikes at Lake O'Hara in Yoho National Park 


There's little point mentioning the magical Lake O'Hara area in Yoho National Park (since you need incredible luck to get spots at either the backcountry cabin or in the backcountry campground here,) but if you want to add this trip to your list of "places I'd like to see in my lifetime," you can find more information on the Yoho National Park website

You can also try to reserve spots on the bus to visit Lake O'Hara as a day trip but you'll need to get spots in the spring or luck out with a cancelation later in the season.

If you did manage to get in to Lake O'Hara, read my guide below:

Read: The Best of Lake O'Hara in a Day 

Opabin Basin, Lake O'Hara, Yoho National Park 

More Suggestions for Larch Hikes in the Canadian Rockies


Check out these guides for more hiking suggestions:

8 Larch Hikes in the Canadian Rockies - Crowfoot Media

Best Larch Hikes in Kananaskis - Kananaskis Trails

Larch Hikes in Kananaskis - Friends of Kananaskis


Autumn hiking at Lake O'Hara, Yoho National Park

Save this story for future reference because I will add to it annually as my family discovers new favourite hikes each autumn.